Part 1
요약·해설
Arm DS에 FVP model configuration을 import하고 Generic Arm C/C++ launch configuration으로 Zephyr ELF를 실행·debug하는 절차입니다. 원문 예시는 Arm DS 2020.b build 2020110909를 사용합니다.
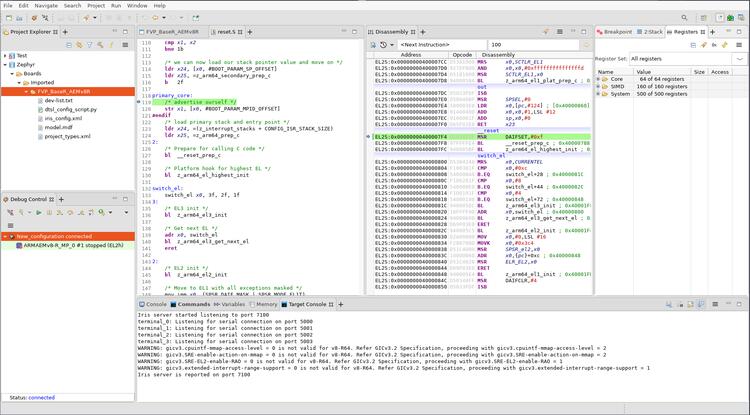
Arm Development Studio 2020.b example
Iris + FVP_BaseR_AEMv8R
V8R64-Generic, ARMAEMv8-R_MP_0
Part 2
접을 수 있는 영어 원문 전체
영어 원문 전체 펼치기
9328CD583BE13ADD20ABE8CF77717DECAA162DC955E6CA9137A679E5284959F7
.. _debug_with_arm_ds:

Debug with Arm DS
#################

Install Arm DS
**************

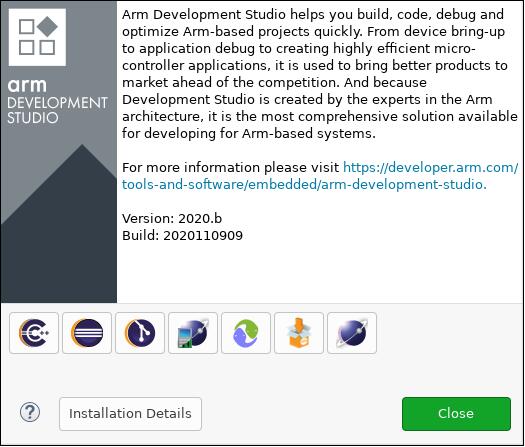
Please refer to the official Arm Development Studio Page [1]_ for details. Here
``Version: 2020.b Build: 2020110909`` is used in the following example.

.. image:: ../../../../../../../boards/arm/fvp_baser_aemv8r/doc/images/version-info.jpg
   :align: center
   :alt: Arm DS Version

Download Arm FVP BaseR AEMv8-R
******************************

Please refer to official FVP page [2]_ for download instructions. Here ``$FVP_D``
is used to indicate which directory is FVP located.

Use DS perspective
******************

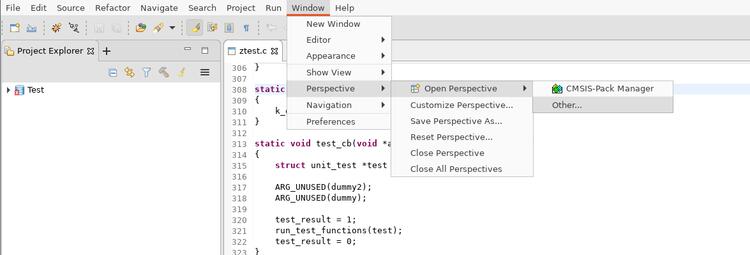
From menu choose ``Window -> Perspective -> Open Perspective -> Other...``:

.. image:: ../../../../../../../boards/arm/fvp_baser_aemv8r/doc/images/perspective-choose-other.jpg
   :align: center
   :alt: Arm DS Perspective choose Other...

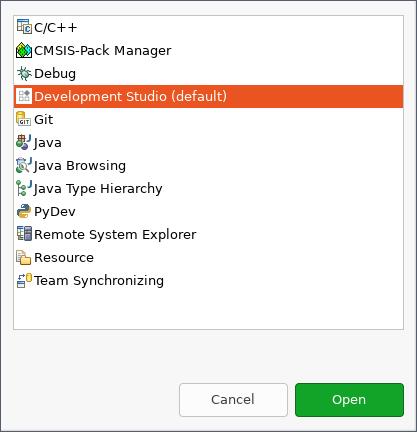
In the opened window, choose ``Development Studio (default)``:

.. image:: ../../../../../../../boards/arm/fvp_baser_aemv8r/doc/images/perspective-choose-ds.jpg
   :align: center
   :alt: Arm DS Perspective choose DS

Create a new configuration database
***********************************

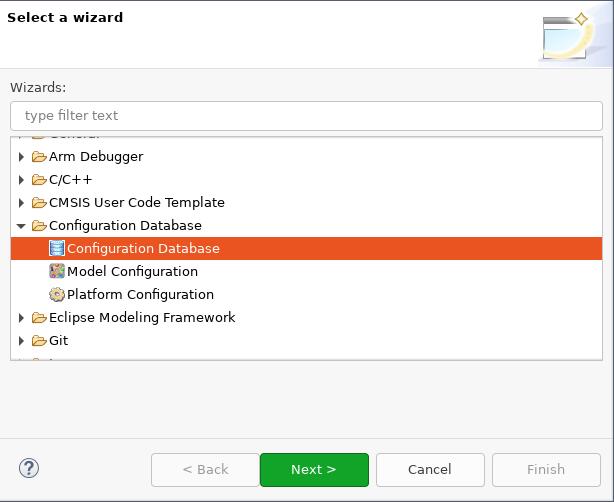
Create a new configuration database by selecting ``File -> New -> Other... -> Configuration Database``:

.. image:: ../../../../../../../boards/arm/fvp_baser_aemv8r/doc/images/create-new-configuration-database.jpg
   :align: center
   :alt: Arm DS create new configuration database

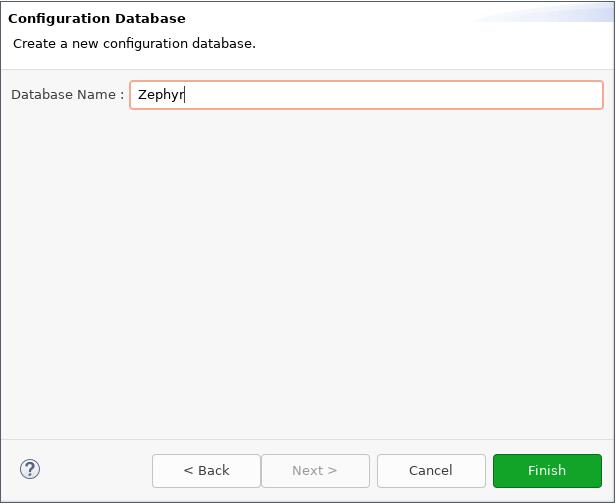
Choose a name for the database. Here ``Zephyr`` is used:

.. image:: ../../../../../../../boards/arm/fvp_baser_aemv8r/doc/images/create-new-configuration-database_database-name.jpg
   :align: center
   :alt: Arm DS create new configuration database: choose database name

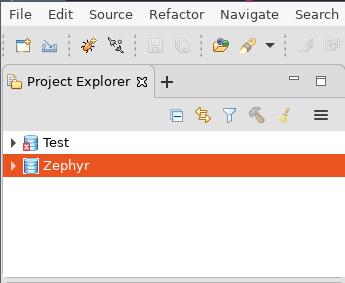
Click ``Finish`` and the new configuration database can be seen in ``Project Explorer``:

.. image:: ../../../../../../../boards/arm/fvp_baser_aemv8r/doc/images/create-new-configuration-database_shown-in-project-explorer.jpg
   :align: center
   :alt: Arm DS create new configuration database: shown in project explorer

Create a new model configuration
********************************

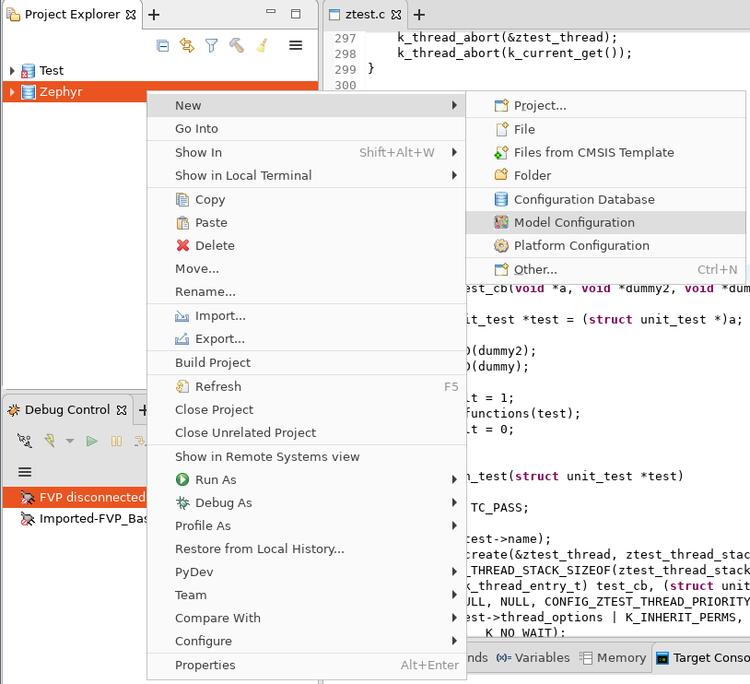
Right click ``Zephyr`` in ``Project Explorer``, choose ``New -> Model Configuration``:

.. image:: ../../../../../../../boards/arm/fvp_baser_aemv8r/doc/images/create-new-model-configuration.jpg
   :align: center
   :alt: Arm DS create new model configuration

In the opened window:

1. Choose ``Iris`` for ``Model Interface``, then ``Next >``.
2. Choose ``Launch and connect to specific model``, then ``Next >``.
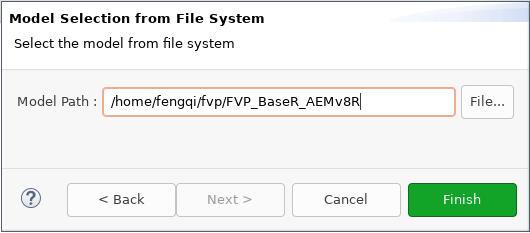
3. Set ``Model Path`` to ``$FVP_D/FVP_BaseR_AEMv8R``, then ``Finish``.

.. image:: ../../../../../../../boards/arm/fvp_baser_aemv8r/doc/images/create-new-model-configuration_model-path.jpg
   :align: center
   :alt: Arm DS create new model configuration: set model path

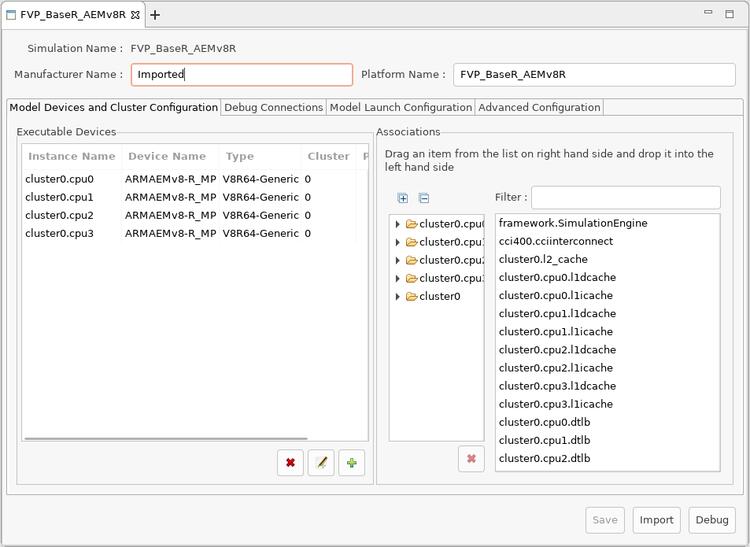
Then in ``FVP_BaseR_AEMv8R`` tab, change ``ARMAEMv8-R_`` to ``V8R64-Generic``,
click ``Save`` and then click ``Import``:

.. image:: ../../../../../../../boards/arm/fvp_baser_aemv8r/doc/images/create-new-model-configuration_model-use-V8R64-Generic.jpg
   :align: center
   :alt: Arm DS create new model configuration: import

Create a new launch configuration
*********************************

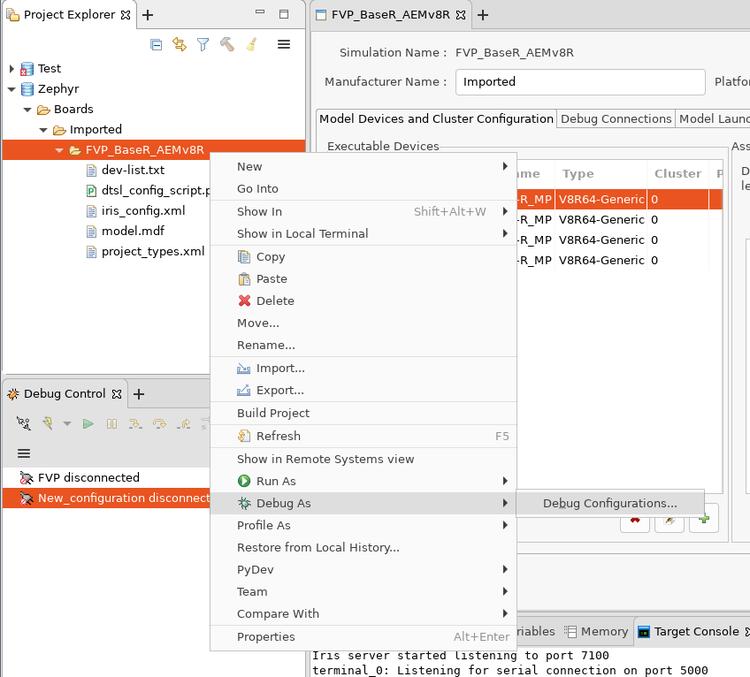
From ``Project Explorer``, right click ``FVP_BaseR_AEMv8R`` and select ``Debug as -> Debug configurations...``:

.. image:: ../../../../../../../boards/arm/fvp_baser_aemv8r/doc/images/create-new-launch-configuration_context-menu.jpg
   :align: center
   :alt: Arm DS create new launch configuration: context menu

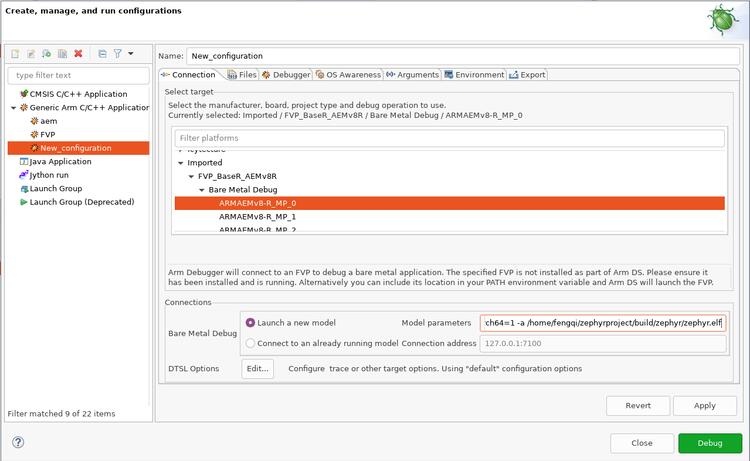
Select ``Generic Arm C/C++ Application`` and click ``New launch configuration`` button.
A new configuration named ``New_configuration`` will be created.

1. In ``Connection`` tab:

   - In ``Select target`` box, select ``Imported -> FVP_BaseR_AEMv8R -> Bare Metal Debug -> ARMAEMv8-R_MP_0``
   - In ``Connections`` box, set ``Model parameters`` to::

       -C bp.dram.enable_atomic_ops=1 -C bp.sram.enable_atomic_ops=1 -C bp.refcounter.non_arch_start_at_default=1 -C gic_distributor.GICD_CTLR-DS-1-means-secure-only=1 -C gic_distributor.has-two-security-states=0 -C bp.vis.disable_visualisation=1 -C cluster0.has_aarch64=1 -a /home/fengqi/zephyrproject/build/zephyr/zephyr.elf

     These parameters are passed to ``FVP_BaseR_AEMv8R`` when launches. Run ``FVP_BaseR_AEMv8R --help``
     to see all command line options. Run ``FVP_BaseR_AEMv8R --list-params`` to see all supported parameters.
     The file ``zephyr.elf`` specified by ``-a`` is the binary built from Zephyr.

.. image:: ../../../../../../../boards/arm/fvp_baser_aemv8r/doc/images/create-new-launch-configuration_connection.jpg
   :align: center
   :alt: Arm DS create new launch configuration: connection

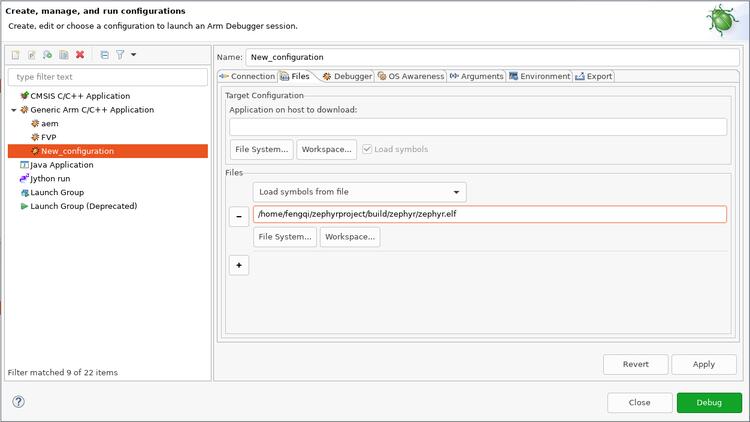
2. In ``Files`` tab:

   In ``Files`` box, set ``Load symbols from file`` to full path of ``zephyr.elf`` that you built.

.. image:: ../../../../../../../boards/arm/fvp_baser_aemv8r/doc/images/create-new-launch-configuration_files.jpg
   :align: center
   :alt: Arm DS create new launch configuration: files

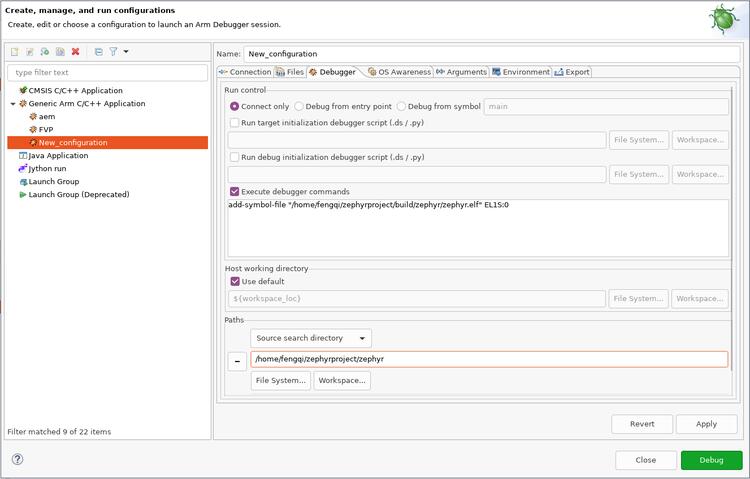
3. In ``Debugger`` tab:

   - In ``Run control`` box, check ``Execute debugger commands`` and insert::

       add-symbol-file "/home/fengqi/zephyrproject/build/zephyr/zephyr.elf" EL1S:0

     Replace ``/home/fengqi/zephyrproject/build/zephyr/zephyr.elf`` with your local path.

   - In ``Paths`` box, set ``Source search directory`` to the path to Zephyr source code.

.. image:: ../../../../../../../boards/arm/fvp_baser_aemv8r/doc/images/create-new-launch-configuration_debugger.jpg
   :align: center
   :alt: Arm DS create new launch configuration: debugger

After all these changes are made, click ``Apply``, then click ``Debug``. DS will
launch ``FVP_BaseR_AEMv8R`` and connect to it. You can see a new session is
connected in ``Debug Control`` window.

.. image:: ../../../../../../../boards/arm/fvp_baser_aemv8r/doc/images/DS-debug-working.jpg
   :align: center
   :alt: Arm DS working

References
**********

.. [1] https://developer.arm.com/tools-and-software/embedded/arm-development-studio
.. [2] https://developer.arm.com/tools-and-software/simulation-models/fixed-virtual-platforms/arm-ecosystem-models
Part 3
한국어 전문 번역
Arm DS 설치
공식 Arm Development Studio page를 따릅니다. 이 예시는 Version: 2020.b Build: 2020110909를 사용합니다.
Arm FVP BaseR AEMv8-R 다운로드
공식 FVP page의 지침을 따릅니다. 아래에서 $FVP_D는 FVP 설치 directory입니다.
DS perspective 사용
menu에서 Window → Perspective → Open Perspective → Other...를 선택합니다.
열린 창에서 Development Studio (default)를 선택합니다.
새 configuration database 만들기
File → New → Other... → Configuration Database를 선택합니다.
database 이름으로 예시의 Zephyr를 입력합니다.
Finish를 누르면 Project Explorer에 새 database가 나타납니다.
새 model configuration 만들기
Project Explorer의 Zephyr를 right-click하고 New → Model Configuration을 선택합니다.
- Model Interface에서
Iris선택 후 Next Launch and connect to specific model선택 후 Next- Model Path를
$FVP_D/FVP_BaseR_AEMv8R로 지정 후 Finish
FVP_BaseR_AEMv8R tab에서 ARMAEMv8-R_을 V8R64-Generic으로 바꾸고 Save, Import를 누릅니다.
새 launch configuration 만들기
Project Explorer의 FVP_BaseR_AEMv8R을 right-click하고 Debug as → Debug configurations...를 선택합니다.
Generic Arm C/C++ Application을 선택하고 New launch configuration을 누르면 New_configuration이 생성됩니다.
Connection tab
Select target에서 Imported → FVP_BaseR_AEMv8R → Bare Metal Debug → ARMAEMv8-R_MP_0을 선택합니다. Model parameters에 다음 값을 넣습니다.
-C bp.dram.enable_atomic_ops=1 -C bp.sram.enable_atomic_ops=1 -C bp.refcounter.non_arch_start_at_default=1 -C gic_distributor.GICD_CTLR-DS-1-means-secure-only=1 -C gic_distributor.has-two-security-states=0 -C bp.vis.disable_visualisation=1 -C cluster0.has_aarch64=1 -a /home/fengqi/zephyrproject/build/zephyr/zephyr.elf이 parameter는 FVP launch 시 전달됩니다. 전체 option은 FVP_BaseR_AEMv8R --help, parameter는 --list-params로 확인합니다. -a의 zephyr.elf가 Zephyr build output입니다.
Files tab
Load symbols from file에 build한 zephyr.elf의 full path를 지정합니다.
Debugger tab
Run control에서 Execute debugger commands를 check하고 다음 command를 넣습니다. local path로 교체해야 합니다.
add-symbol-file "/home/fengqi/zephyrproject/build/zephyr/zephyr.elf" EL1S:0Paths의 Source search directory에 Zephyr source path를 지정합니다.
Apply와 Debug를 누르면 DS가 FVP_BaseR_AEMv8R을 실행하고 연결합니다. Debug Control 창에서 새 session을 확인할 수 있습니다.
참고 자료
Source
출처
영어 원문에는 문단, 문서 지시문, 표, 코드, 코드 심벌, 경로를 그대로 보존했습니다.