Part 1
요약·해설
초기화 priority, Devicetree overlay와 두 serial terminal 시험 절차를 설명합니다.
uart0
Button 1 at boot
4 official images
Part 2
접을 수 있는 영어 원문 전체
영어 원문 전체 펼치기
AEA5012B002FF6BD2F092C6CABFFCBEC5A90FC2171B5E931EAF371FFBAE6EE10
.. _samples_boards_nrf_dynamic_pinctrl:

Dynamic Pin Control (nRF)
#########################

The Dynamic Pin Control (nRF) sample demonstrates how to change ``uart0`` at
early boot stages, depending on the input level on a pin connected to a
push-button.

Overview
********

Slightly different board revisions that implement just small changes (like
improving the PCB layout or changing components to new equivalents) do not
necessarily require changes to the firmware. As such, one firmware image can be
able to boot onto multiple board revisions.

However, if a certain peripheral is routed to different sets of pins between
revisions, the firmware needs to select the appropriate routing when the
system is initialized.

The Dynamic Pin Control (nRF) sample allows you to select the appropriate routing.

If the push button is not pressed, the system does nothing and continues with
the default configuration. If the button is pressed, the alternative
configuration is applied.

Alternative configurations can only be applied if the device driver using the
associated pins has not been initialized yet. Therefore, pay attention to the
initialization priorities set in the :file:`prj.conf` file.

nRF52840 DK
===========

The diagram below shows the pins assigned to the default and alternative
configurations.

.. figure:: ../../../../../../../samples/boards/nrf/dynamic_pinctrl/images/nrf52840dk-dynamic-pinctrl.png

    Configuration for nRF52840 DK

If you power on the board, the ``uart0`` peripheral is routed to the default
set of pins. The default set of pins is also exposed through the left USB
connector as a virtual COM port.

If you power on the board while holding Button 1, the ``uart0`` peripheral is
routed to the alternative set of pins.

Building and Running
********************

You can build this application for the nRF52840 DK as follows:

.. zephyr-app-commands::
   :zephyr-app: samples/boards/nrf/dynamic_pinctrl
   :board: nrf52840dk/nrf52840
   :goals: build
   :compact:

The sample can also support other nRF based boards if you provide a Devicetree
overlay file with an alternative configuration for ``uart0``. Select ``uart0``
for ``zephyr,console`` to make the sample work as expected.

Sample Output
=============

Follow these steps to test the two configurations :

1. Connect a USB-to-UART adapter to both sets of pins. If the board routes the
   default configuration to a virtual COM port (as in the nRF52840 DK), you can
   directly use that port.

#. Open two serial terminals, one connected to the default set of pins and the
   other connected to the alternative set of pins.

   .. figure:: ../../../../../../../samples/boards/nrf/dynamic_pinctrl/images/terminals-empty.png

       Two serial terminals (left: default, right: alternative).

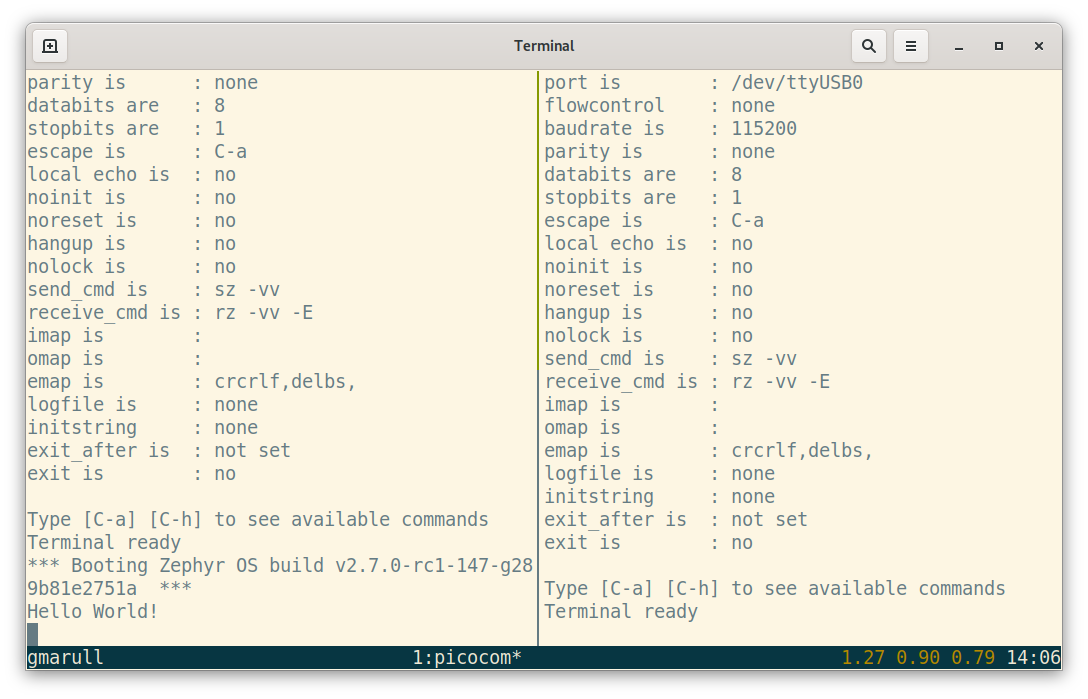
#. Turn on the board. You should see a ``Hello World!`` message printed on
   the first terminal.

   .. figure:: ../../../../../../../samples/boards/nrf/dynamic_pinctrl/images/terminals-default.png

       ``Hello World!`` printed on the default set of pins.

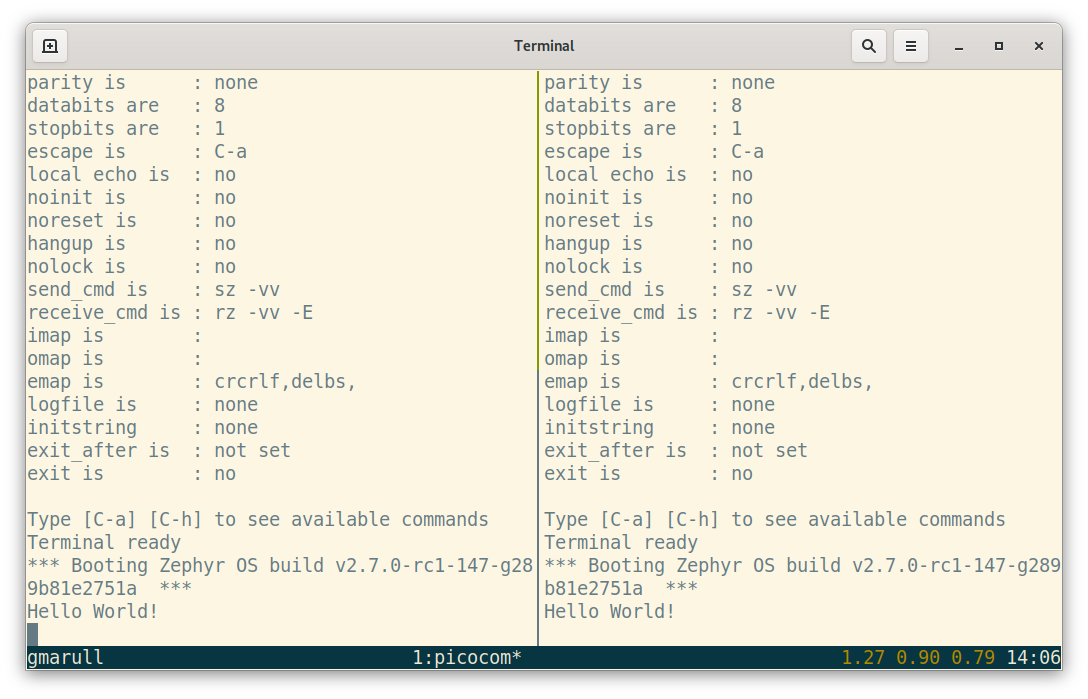
#. Press and hold the configuration-selection push-button (button 1 on the
   nRF52840 DK) and press the board reset button. You now should see a
   ``Hello World!`` message on the second terminal.

   .. figure:: ../../../../../../../samples/boards/nrf/dynamic_pinctrl/images/terminals-alt.png

       ``Hello World!`` printed on the alternative set of pins.
Part 3
한국어 전문 번역
Dynamic Pin Control (nRF) sample은 push-button에 연결된 pin의 input level에 따라 early boot 단계에서 uart0 pin routing을 바꾸는 방법을 보여줍니다.
개요
PCB layout을 개선하거나 component를 동등한 새 부품으로 바꾸는 정도의 작은 차이만 있는 board revision은 firmware를 반드시 변경할 필요가 없습니다. 따라서 firmware image 하나가 여러 board revision에서 boot할 수 있습니다.
하지만 revision 사이에서 특정 peripheral이 서로 다른 pin 묶음으로 routing된다면 system 초기화 때 firmware가 올바른 routing을 선택해야 합니다. 이 sample은 그 적절한 routing을 선택하게 해 줍니다.
Push button을 누르지 않으면 system은 아무 작업도 하지 않고 default configuration으로 계속 진행합니다. Button을 누르면 alternative configuration을 적용합니다.
Alternative configuration은 관련 pin을 사용하는 device driver가 아직 초기화되지 않았을 때만 적용할 수 있습니다. 그러므로 prj.conf에 설정된 initialization priority를 주의해서 구성해야 합니다.
nRF52840 DK
아래 그림은 default configuration과 alternative configuration에 할당된 pin을 보여줍니다.
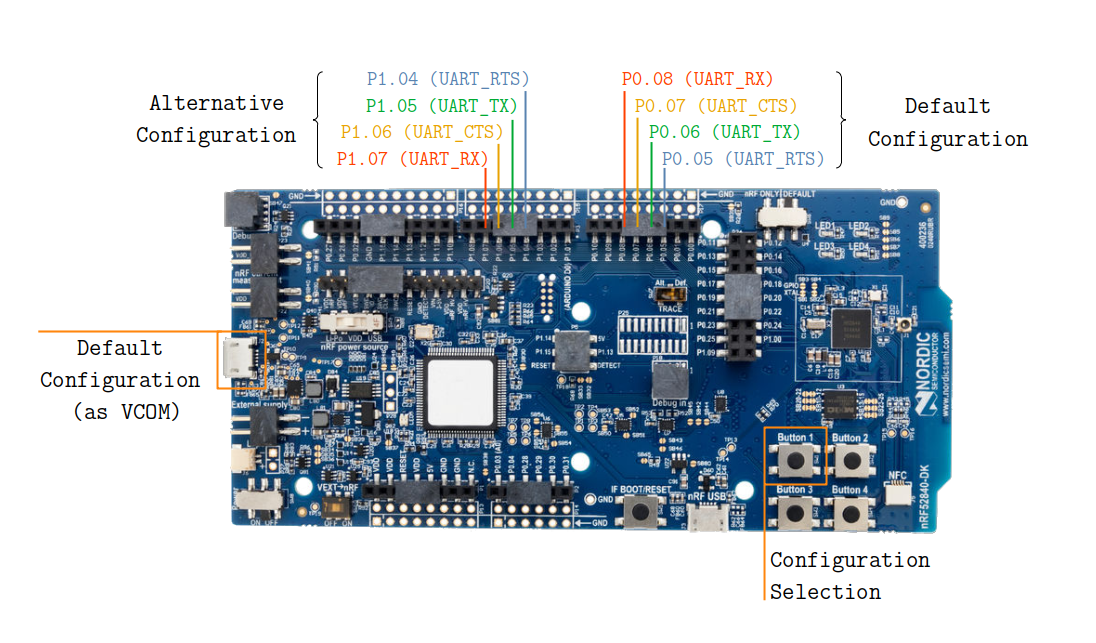
Board의 전원을 켜면 uart0 peripheral은 default pin 묶음으로 routing됩니다. 이 default pin 묶음은 왼쪽 USB connector를 통해 virtual COM port로도 노출됩니다.
Button 1을 누른 채 board의 전원을 켜면 uart0 peripheral이 alternative pin 묶음으로 routing됩니다.
Build와 실행
nRF52840 DK용 application은 다음과 같이 build할 수 있습니다.
west build -b nrf52840dk/nrf52840 samples/boards/nrf/dynamic_pinctrluart0의 alternative configuration을 담은 Devicetree overlay file을 제공하면 다른 nRF 기반 board도 이 sample을 지원할 수 있습니다. Sample이 의도한 대로 동작하도록 zephyr,console에는 uart0를 선택합니다.
Sample 출력
두 configuration을 시험하려면 다음 순서로 진행합니다.
- USB-to-UART adapter를 두 pin 묶음 모두에 연결합니다. nRF52840 DK처럼 board가 default configuration을 virtual COM port로 routing한다면 그 port를 바로 사용할 수 있습니다.
- Serial terminal 두 개를 열어 하나는 default pin 묶음에, 다른 하나는 alternative pin 묶음에 연결합니다.
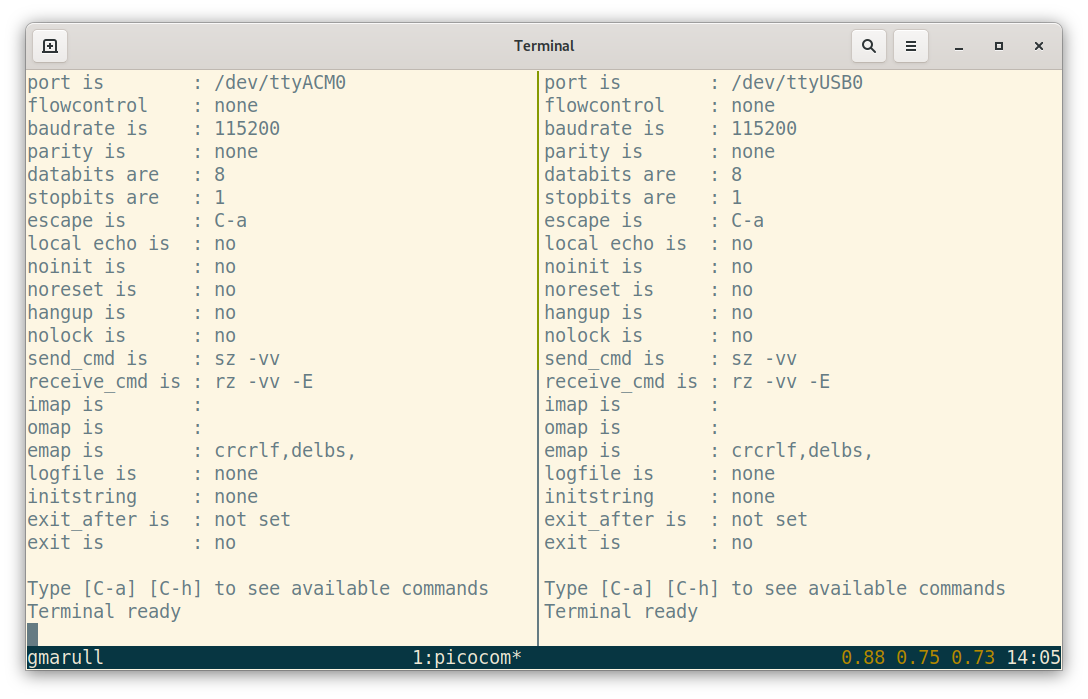
- Board의 전원을 켭니다. 첫 번째 terminal에
Hello World!message가 출력되어야 합니다.
Hello World!.- Configuration 선택 push-button(nRF52840 DK에서는 Button 1)을 누른 채 board reset button을 누릅니다. 이제 두 번째 terminal에
Hello World!message가 보여야 합니다.
Hello World!.Source
출처
영어 원문에는 문단, 문서 지시문, 표, 코드, 코드 심벌, 경로를 그대로 보존했습니다.