Part 1
요약·해설
16Mbit flash, touchpad 4개, 5초 programmer 진입 창과 M4 image 적재 절차를 설명합니다.
Platform
QuickLogic EOS S3
Flash
16 Mbit
Programmer
TinyFPGA · --mode m4
Part 2
접을 수 있는 영어 원문 전체
영어 원문 전체 펼치기
원문 SHA-256
2205E91E4BE7A60976D51EB97CF66DC00B18365B613717D2CA9ECB5109DE2A24
.. _qomu:

Qomu
####

Overview
********

The Qomu board is a platform with an on-board QuickLogic EOS S3 Sensor Processing Platform.


.. figure:: ../../../../../../../boards/quicklogic/qomu/doc/img/qomu-board.png
   :align: center
   :alt: Qomu

   Qomu (Credit: QuickLogic)

Hardware
********

- QuickLogic EOS S3 MCU Platform
- 16 Mbit of on-board flash memory
- Touchpads (4)
- RGB LED
- Powered from USB

Detailed information about the board can be found in a `Qomu repository`_ and `Qomu User Guide`_.

Connections and IOs
===================

Detailed information about pinouts is available in the `schematics document`_.

Programming
***********

The Qomu platform by default boots from flash.

Below are steps to run Qomu sample application:

#. Build the sample in an usual way:

   .. zephyr-app-commands::
      :zephyr-app: samples/boards/qomu
      :board: qomu
      :goals: build

#. Remove Qomu board from USB port.
#. Insert Qomu board to USB port.
#. While the blue LED is blinking (for 5 seconds), touch the touch-pads with your finger.
   On success, the green led will start flashing.
#. Use TinyFpgaProgrammer application to load the target application:

   .. code-block:: console

      python3 /path/to/TinyFPGA-Programmer-Application/tinyfpga-programmer-gui.py --mode m4 --m4app build/zephyr/zephyr.bin --reset

   Refer to `TinyFPGA Programmer Application repo`_ for detailed information on installation
   and program usage.


References
**********

.. target-notes::

.. _Qomu repository:
    https://github.com/QuickLogic-Corp/qomu-dev-board

.. _Qomu User Guide:
    https://github.com/QuickLogic-Corp/qomu-dev-board/blob/master/doc/Qomu_UserGuide.pdf

.. _schematics document:
    https://github.com/QuickLogic-Corp/qomu-dev-board/blob/master/doc/qomu-board.pdf

.. _TinyFPGA Programmer Application repo:
    https://github.com/QuickLogic-Corp/TinyFPGA-Programmer-Application
Part 3
한국어 전문 번역
개요
Qomu는 on-board QuickLogic EOS S3 Sensor Processing Platform을 갖춘 보드입니다.
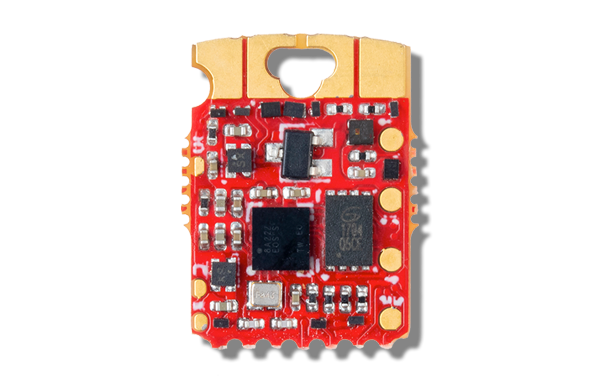
하드웨어
- QuickLogic EOS S3 MCU platform
- On-board flash memory 16Mbit
- Touchpad 4개
- RGB LED
- USB 전원
자세한 내용은 Qomu repository와 Qomu User Guide에서 확인할 수 있습니다.
연결과 I/O
Pinout은 schematic document에 있습니다.
프로그래밍
Qomu platform은 기본적으로 flash에서 boot합니다. Sample application 실행 순서는 다음과 같습니다.
- Sample을 build합니다.
# Zephyr 저장소 루트에서
west build -b qomu samples/boards/qomu- Qomu를 USB port에서 분리합니다.
- Qomu를 USB port에 다시 꽂습니다.
- Blue LED가 5초 동안 깜빡이는 동안 손가락으로 touchpad를 누릅니다. 성공하면 green LED가 깜빡이기 시작합니다.
- TinyFPGA Programmer application으로 target application을 적재합니다.
python3 /path/to/TinyFPGA-Programmer-Application/tinyfpga-programmer-gui.py --mode m4 --m4app build/zephyr/zephyr.bin --reset설치와 사용법은 TinyFPGA Programmer Application repository를 참고합니다.
Source
출처
영어 원문에는 문단, 문서 지시문, 표, 코드, 코드 심벌, 경로를 그대로 보존했습니다.