Part 1
요약·해설
Xtensa는 processor option과 custom instruction을 선택할 수 있는 configurable 32-bit RISC architecture입니다. xt-sim은 sample_controller core를 공식 지원하며 simulation clock은 25 MHz입니다.
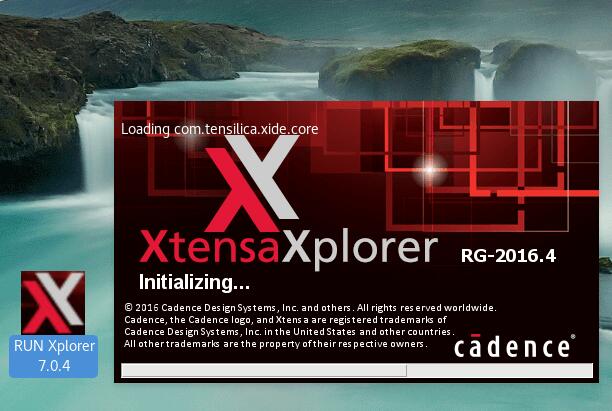
Configurable 32-bit RISC
sample_controller
25 MHz
Part 2
접을 수 있는 영어 원문 전체
영어 원문 전체 펼치기
2AD746CD8FA56FB5C28E38EEAA76E3982DAE827A1B08A5D590B57F905A1C72B0
.. _xt-sim:

Xtensa simulator
################

Overview
********

The Xtensa processor architecture is a configurable, extensible, and
synthesizable 32-bit RISC processor core. Processor and SOC vendors can select
from various processor options and even create customized instructions in
addition to a base ISA to tailor the processor for a particular application.

For more information, see https://ip.cadence.com/ipportfolio/tensilica-ip/xtensa-customizable

.. figure:: ../../../../../../../boards/cdns/xt-sim/doc/img/xt-sim.jpg
     :align: center
     :alt: Xtensa Xplorer (Eclipse base frontend for xt-sim)

     Xtensa Xplorer

Hardware
********

The following Xtensa cores are officially supported:

- sample_controller

System Clock
============

Xtensa cores can be configured to use either internal or external timers.
The frequency of the clock under simulation is set to 25MHz.

System requirements
*******************

Prerequisites
=============
A Linux host system is required for Xtensa development work.
We recommend using a __``Debian 9.x (Stretch)``__ or recent __``Ubuntu``__
releases (with multilib support).

Only Xtensa tools version ``RF-2016.4-linux`` or later are officially
supported. Other versions may work but are not supported by Cadence Systems Inc.

In order to set up the Zephyr OS build system, a Linux 32-bit GCC compiler must
be installed on the building linux box. Install GCC if needed either by
downloading ``Zephyr SDK`` or by using your distribution package manager.

On Debian/Ubuntu systems, you can install ``gcc-multilib`` package as follows:

.. code-block:: console

    #aptitude install gcc-multilib # Or what ever package manager (apt, apt-get, ...)

Set up build environment
========================

We recommend you create a ``~/.zephyrrc`` file, a shell script that shall be
sourced each time before you start working on Zephyr.
You can use the following code to create that file:

.. code-block:: console

    $ cat > ~/.zephyrrc
    if test "${CROSS}" = xcc
    then
    	export ARCH=xtensa
    	export BOARD=xt-sim
        export ZEPHYR_TOOLCHAIN_VARIANT=xcc
    	export XTENSA_TOOLS_PATH=/opt/xtensa/XtDevTools/install/tools/RG-2016.4-linux/XtensaTools
    	export XTENSA_BUILDS_PATH=/opt/xtensa/XtDevTools/install/builds/RG-2016.4-linux
    	#export XTENSA_BUILD_DIR= #Keep empty to use default directory
    	export EMU_PLATFORM=xt-run
    elif test "${CROSS}" = zephyr-xtensa
    then
    	export ARCH=xtensa
    	export BOARD=qemu
    	export ZEPHYR_TOOLCHAIN_VARIANT=zephyr
    	export ZEPHYR_SDK_INSTALL_DIR=/opt/xtensa/zephyr-sdk-64-INTERNAL-11-22-2016
    elif test "${CROSS}" = zephyr-x86
    then
    	export ARCH=x86
    	export BOARD=qemu_x86
    	export ZEPHYR_TOOLCHAIN_VARIANT=zephyr
    	export ZEPHYR_SDK_INSTALL_DIR=/opt/xtensa/zephyr-sdk-64-INTERNAL-11-22-2016
    else
    	echo "Unsupported compiler '${CROSS}' defined by environment variable CROSS"
    fi

Once the ``~/.zephyrrc`` file is created, you can start working. However, each
time you start a new shell you will need to execute the following commands
before you can compile anything:

.. code-block:: console

    $ cd path/to/zephyr # replace path/to by a real path
    $ CROSS=xcc source zephyr-env.sh # Select xcc as compiler

Adding a user-defined Xtensa core
=================================
Add your own core to the list of supported cores as follows:

.. code-block:: console

    $ XTENSA_CORE=myCore
    $ $(which echo) -e "config ${XTENSA_CORE}\n\tbool \"${XTENSA_CORE} core\"\n" >> "soc/xtensa/Kconfig.cores"

Create a folder for that core:

.. code-block:: console

    $ mkdir soc/xtensa/${XTENSA_CORE}

Create and copy to that folder a custom linker script (more on linker script in next section):

.. code-block:: console

    $ cp  linker.ld  soc/xtensa/${XTENSA_CORE}/linker.ld

Add a Makefile:

.. code-block:: console

    $ echo "obj-y = soc.o" > soc/xtensa/${XTENSA_CORE}/Makefile

Add Zephyr specific sections to the linker script.
The file "soc/xtensa/linker_more.ld" contains Zephyr-specific linker
sections that should be added to the default linker script linker.ld (inside
SECTIONS region). If you are not using a linker script, you must create one
and add these sections. The memory segment and PHDR should be replaced by
appropriate values.

The linker script should be named ``linker.ld`` and placed in the directory
``soc/xtensa/${XTENSA_CORE}``.

Configuring build
=================

.. zephyr-app-commands::
   :zephyr-app: samples/hello_world
   :goals: menuconfig

Below is an example of usage for typical configuration:

1. Select ``Architecture``
    a. Select ``Xtensa architecture``
2. Select ``XTENSA core Selection``
    a. Select appropriate core (example ``hifi3_bd5 core``)
3. Select ``XTENSA Options``
    a. Set ``Hardware clock cycles per second`` to appropriate value
    b. Set ``The path to Xtensa tool`` to appropriate value
    c. Set ``The version of Xtensa tool`` to appropriate version
    d. Set ``Xtensa build directory`` to appropriate  value
4. Select ``Board Selection``
    a. Select ``Xtensa Development ISS``
5. Select ``Device Drivers``
    a. Uncheck ``Serial Drivers``
6. Select ``Compile and Link Features``
	a. Set compiler configuration and build options correctly to project requirements
7. Hit ``Exit`` and confirm saving the changes.

You may need to change other options in menuconfig depending on his project
specific needs.

Compiling and running
=====================
The Xtensa executable can be run in the simulator either with a standalone core,
or with a core connected to simulated peripherals.

Build and run as follows:

.. zephyr-app-commands::
   :goals: run

References
**********

.. _Xtensa tools: https://ip.cadence.com/support/sdk-evaluation-request
Part 3
한국어 전문 번역
개요
Xtensa processor architecture는 구성 가능하고 확장 가능하며 합성 가능한 32-bit RISC processor core입니다. processor와 SoC vendor는 base ISA 외에 여러 processor option을 선택하고 custom instruction까지 만들어 특정 application에 맞게 processor를 조정할 수 있습니다.
자세한 내용은 Cadence Xtensa Customizable Processors를 참고하십시오.
하드웨어
공식 지원하는 Xtensa core는 다음과 같습니다.
sample_controller
System clock
Xtensa core는 internal timer 또는 external timer를 사용하도록 구성할 수 있습니다. simulation에서 clock frequency는 25 MHz로 설정됩니다.
시스템 요구 사항
사전 준비
Xtensa 개발 작업에는 Linux host system이 필요합니다. multilib를 지원하는 Debian 9.x (Stretch) 또는 최신 Ubuntu release를 권장합니다.
Xtensa tools RF-2016.4-linux 이상만 공식 지원합니다. 다른 version도 동작할 수 있지만 Cadence Systems Inc.가 지원하지 않습니다.
Zephyr OS build system을 설정하려면 build에 사용하는 Linux 장비에 Linux 32-bit GCC compiler가 설치되어 있어야 합니다. 필요하면 Zephyr SDK를 내려받거나 distribution package manager를 사용해 GCC를 설치하십시오.
Debian/Ubuntu system에서는 다음과 같이 gcc-multilib package를 설치할 수 있습니다.
# aptitude install gcc-multilib # 또는 사용하는 package manager(apt, apt-get, ...)Build environment 설정
Zephyr 작업을 시작할 때마다 source할 shell script인 ~/.zephyrrc file을 만들 것을 권장합니다. 다음 code로 file을 만들 수 있습니다.
$ cat > ~/.zephyrrc
if test "${CROSS}" = xcc
then
    export ARCH=xtensa
    export BOARD=xt-sim
    export ZEPHYR_TOOLCHAIN_VARIANT=xcc
    export XTENSA_TOOLS_PATH=/opt/xtensa/XtDevTools/install/tools/RG-2016.4-linux/XtensaTools
    export XTENSA_BUILDS_PATH=/opt/xtensa/XtDevTools/install/builds/RG-2016.4-linux
    #export XTENSA_BUILD_DIR= #Keep empty to use default directory
    export EMU_PLATFORM=xt-run
elif test "${CROSS}" = zephyr-xtensa
then
    export ARCH=xtensa
    export BOARD=qemu
    export ZEPHYR_TOOLCHAIN_VARIANT=zephyr
    export ZEPHYR_SDK_INSTALL_DIR=/opt/xtensa/zephyr-sdk-64-INTERNAL-11-22-2016
elif test "${CROSS}" = zephyr-x86
then
    export ARCH=x86
    export BOARD=qemu_x86
    export ZEPHYR_TOOLCHAIN_VARIANT=zephyr
    export ZEPHYR_SDK_INSTALL_DIR=/opt/xtensa/zephyr-sdk-64-INTERNAL-11-22-2016
else
    echo "Unsupported compiler '${CROSS}' defined by environment variable CROSS"
fi
~/.zephyrrc file을 만들면 작업을 시작할 수 있습니다. 다만 새 shell을 열 때마다 compile하기 전에 다음 command를 실행해야 합니다.
$ cd path/to/zephyr # path/to를 실제 경로로 바꿉니다
$ CROSS=xcc source zephyr-env.sh # compiler로 xcc를 선택합니다
사용자 정의 Xtensa core 추가
다음과 같이 자신의 core를 지원 core 목록에 추가합니다.
$ XTENSA_CORE=myCore
$ $(which echo) -e "config ${XTENSA_CORE}\n\tbool \"${XTENSA_CORE} core\"\n" >> "soc/xtensa/Kconfig.cores"
그 core의 folder를 만듭니다.
$ mkdir soc/xtensa/${XTENSA_CORE}custom linker script를 만들고 그 folder에 복사합니다. linker script에 관한 설명은 다음 절에서 이어집니다.
$ cp linker.ld soc/xtensa/${XTENSA_CORE}/linker.ldMakefile을 추가합니다.
$ echo "obj-y = soc.o" > soc/xtensa/${XTENSA_CORE}/Makefilelinker script에 Zephyr 전용 section을 추가합니다. soc/xtensa/linker_more.ld에는 기본 linker.ld의 SECTIONS 영역 안에 추가해야 하는 Zephyr 전용 linker section이 들어 있습니다. linker script를 사용하지 않는다면 새로 만들고 이 section들을 추가해야 합니다. memory segment와 PHDR은 알맞은 값으로 바꿔야 합니다.
linker script 이름은 linker.ld여야 하며 soc/xtensa/${XTENSA_CORE} directory에 두어야 합니다.
Build 구성
west build -b xt-sim samples/hello_world -t menuconfig일반적인 configuration 예는 다음과 같습니다.
Architecture를 선택하고Xtensa architecture를 선택합니다.XTENSA core Selection을 선택하고 알맞은 core, 예를 들어hifi3_bd5 core를 선택합니다.XTENSA Options에서Hardware clock cycles per second,The path to Xtensa tool,The version of Xtensa tool,Xtensa build directory를 각각 알맞게 설정합니다.Board Selection에서Xtensa Development ISS를 선택합니다.Device Drivers에서Serial Drivers를 선택 해제합니다.Compile and Link Features에서 project 요구 사항에 맞게 compiler configuration과 build option을 설정합니다.Exit를 누르고 변경 내용 저장을 확인합니다.
project별 요구 사항에 따라 menuconfig의 다른 option도 바꿔야 할 수 있습니다.
Compile과 실행
Xtensa executable은 standalone core 또는 simulated peripheral에 연결된 core를 사용해 simulator에서 실행할 수 있습니다.
다음과 같이 build하고 실행합니다.
west build -b xt-sim samples/hello_world
west build -t run
참고 자료
Source
출처
영어 원문에는 문단, 문서 지시문, 표, 코드, 코드 심벌, 경로를 그대로 보존했습니다.